


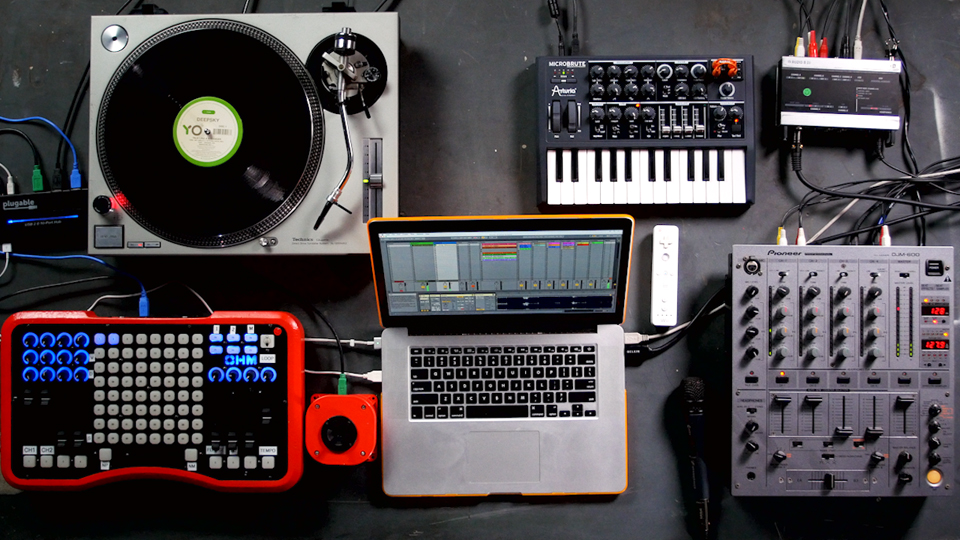
Ableton’s astounding softsynth, Operator, is often overlooked by producers. Many favor its paid counterparts, like Serum and Massive. Despite this hierarchy, Operator is more than suitable for a wide range of syntheses. Operator particularly excels in its inherent ability to create pleasant ‘808-style’ electronic drums.
With synthesis basics in mind, it’s easier to create sounds you think of. These sounds also work well layered with samples, if you’re looking to combine digital and analog sounds in your productions. Experimenting with Operator at a fundamental level is really helpful for wrapping your head around the deceivingly complex process of patching softsynths. Samples can make the creation of beats swift and uncomplicated, but knowing how to synthesize your own drums will give you a better understanding of how drum sounds work and are created.
In this article, we will tackle the task of explaining the basics of percussion synthesis, with Operator as our platform. We will also briefly explain how to glue together drum sounds and make thin digital drums sound “chunkier”. Synthesizing your own drum sounds doesn’t have to be intimidating; overall, it gives you more control over the qualities and understanding of the sound.
The Starting Line
To start creating any drum sound, open an instance of Operator. You can use any waveform you like, but we find that the sine wave and noise waves (looped/white) are best for making drum sounds. You can certainly use others, just be prepared to introduce more harmonics into the sound, as that will have to be considered. “Noise Looped” is a looped noise sample, while “Noise White“ is authentically random noise.
By changing the algorithm settings in Operator, we unlock feedback control for the individual oscillators (Try running the oscillators in parallel!). This is another way to add new qualities to your sound, without changing the source wave form. You can also emphasize the transient of your sound by dialing in the pitch envelope. This ability’s usefulness really shines through when creating an 808 kick or bass sound. The pitch envelope can be used to give a sound a satisfying articulate ‘snap’.
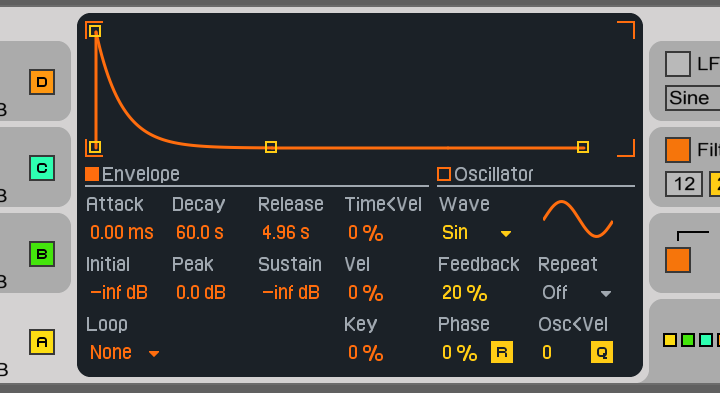
Example of an 808 kick/bass sound made with Operator. We dialed in the length using the ‘time’ feature of Operator.
Layering Operator’s oscillators is another a great way to build interesting sounds. By layering or modulating a pitched sine wave with a noise oscillator, we can create DnB snare noises, ping-y ride cymbals, or shimmery hihats. However, for a basic closed hihat, we can get away with one oscillator.
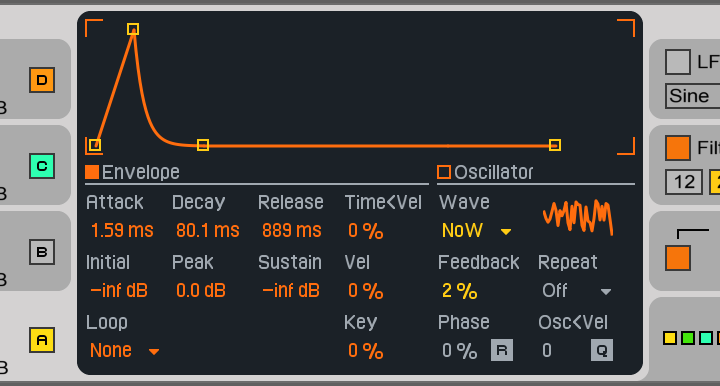
Our closed hihat’s envelope, made with Operator
To create an open hihat sound, we start with the closed hihat patch we just created. By adjusting the pitch envelope, sustain, decay, and release of the sound, we can fine tune the pitch and timbre of our sound. Using the ‘feedback’ setting for our oscillator can also create, add, or manipulate the harmonics to our liking.
Homogenizing The Sounds
You can hear obvious similarities between these patches and the unique ‘unnatural’ sound of vintage drum synthesizers. We will also delve briefly into the processing of these sounds, to help give your drum kit a more unified sound. For sake of simplicity, we will be dealing solely with two of Ableton’s stock instruments and effects.
The Glue Compressor and Vinyl Distortion audio effects are perfect for this stage in the process. Ableton’s Glue tames the transients and ‘glues’ your drum elements together. It emulates the sound of a vintage compressor and typically adds or improves sonic character.
Vinyl Distortion is also an under appreciated effect in Ableton. The effect models vinyl distortion, giving sounds a grittier, more organic sound. But it must be used in moderation! In excess, Vinyl Distortion can make things sound ‘boxy’ or ‘boomy’. By adjusting the affected frequency range, mix, and drive within the effect, you can dial in the settings to your preference.
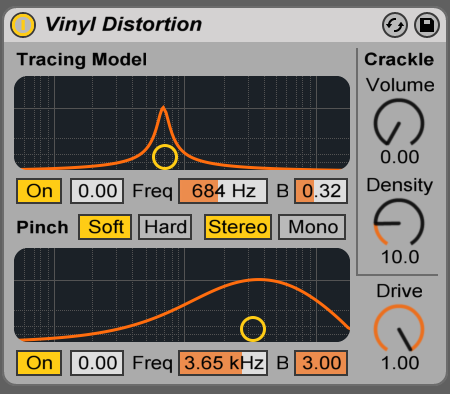
A default instance of Ableton’s awesome Vinyl Distortion
Also, shy away from the ‘crackle’ feature of Vinyl Distortion. While it’s a cool feature, it mostly adds an unpredictable element that can be difficult to control. This gimmick definitely has application but it should be strongly contemplated before inclusion in your compositions. The effect really excels at brightening up and ‘organicizing’ your sounds. However, like the rest of these tips, use these guidelines for your own unique purposes!
To wrap up our segment, here are some more reasons to synthesize your drums over using samples-
Synthesis gives you authoritative, uncomplicated control over your dynamics. It’s easier to tune drums with specific frequencies in mind (You can use Ableton’s ‘Tuner’ to reference the pitch at a higher pitch, then pitch down to the desired place once it’s sounding good. This also helps Tuner readily recognize pitches, as it has difficultly with low frequency sounds). Drum sounds are often melodic in a sense. Having a fine-tuned control over the pitch makes pitching drum samples effortless.
Synthesis also provides music-makers additional control over fundamental drum qualities, like the body of a snare, or the release of hihat. You can also use an analog synthesizer of your choice, like the recently rebooted ARP Odyssey from Korg.
There are tons more synths to create drums with; which do you use to create percussion elements? What gives them an edge over Operator? Let us know in the comments below!
Important things happen in Pacific Northwest nightlife, and DMNW will send you alerts!